

DIY nursery Book Shelves
Creating a cozy and inviting space for your baby involves many details, from choosing the right crib to selecting the perfect wall color. One essential element often overlooked is the nursery bookshelf. Not only does it provide a convenient place to store your baby’s books and toys, but it also adds a decorative touch to the room. Customizing your own DIY Nursery Book Shelves allows you to match your decor and create a unique piece that reflects your style.
Customizing DIY nursery Book Shelves is a fun and rewarding project. It gives you the freedom to choose colors, patterns, and designs that suit your taste and your child’s personality. Plus, it can be a budget-friendly option compared to buying pre-decorated shelves. This complete guide will walk you through every step of the process, from choosing the right shelves to painting and installing them.

1. Choosing the Right DIY Nursery Book Shelves
When it comes to selecting the perfect DIY nursery book shelves, there are several factors to consider. First, think about the size and shape of the shelves. Do you need a single shelf or a set of floating nursery book shelves? Consider the space available in your nursery and how much storage you require.
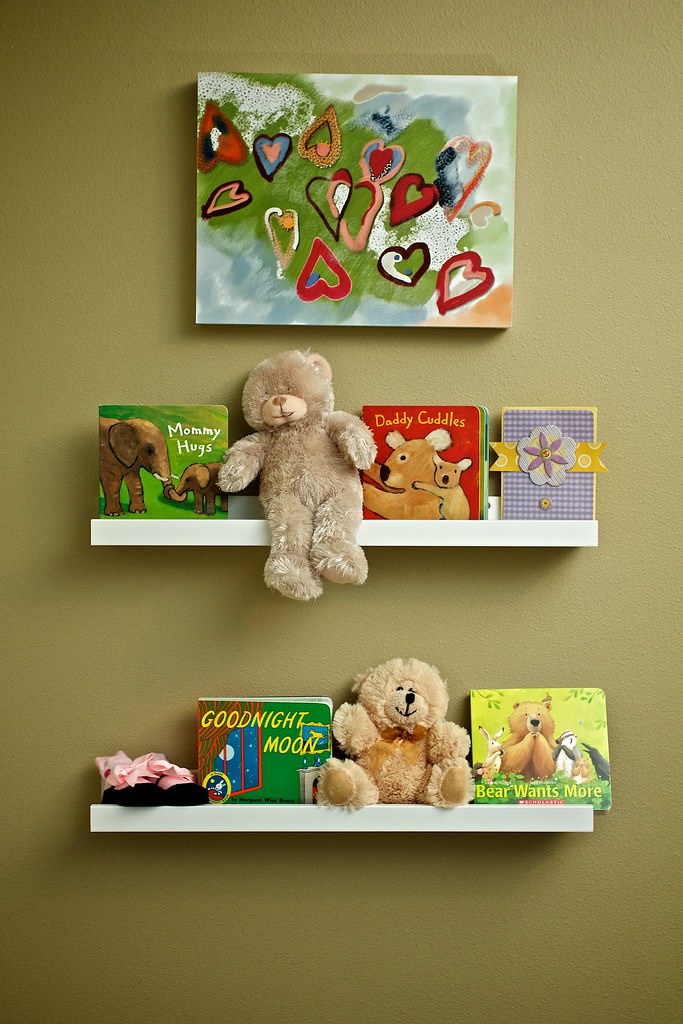
Floating nursery book shelves are a popular choice because they save floor space and can be arranged in various configurations. You might also consider a bookshelf for kids’ rooms wall, which can be both decorative and functional. Another option is nursery shelves for the wall, which are ideal for displaying books, toys, and decorative items.
Material is another important consideration. Wooden shelves are sturdy and can be easily painted and customized. MDF (medium-density fiberboard) is a budget-friendly alternative that also takes paint well. Metal and plastic shelves are less common for DIY projects but can offer a modern look.
One popular choice for DIY nursery book shelves is by HOMEY PANDA. These shelves are designed to be easily customizable and come in various sizes and shapes to fit any nursery decor. HOMEY PANDA‘s shelves are made from high-quality materials, ensuring durability and longevity.
Once you have decided on the type and material of your shelves, it’s time to purchase them. Many stores offer pre-made shelves specifically designed for nurseries, but you can also find plain shelves at home improvement stores that can be customized to your liking.
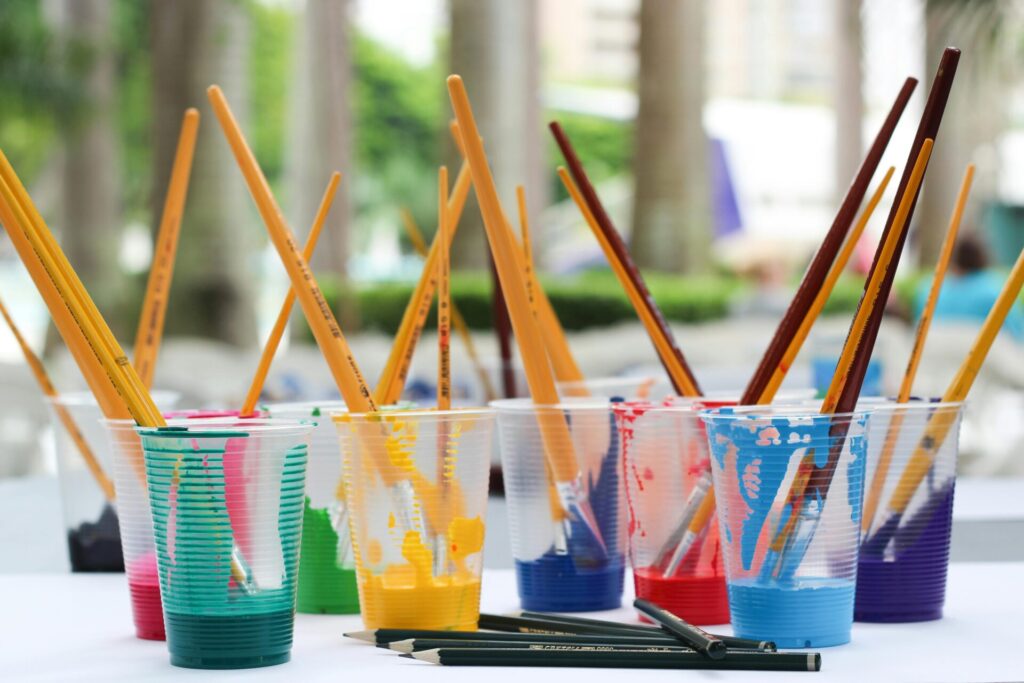
2. Essential Materials and Tools
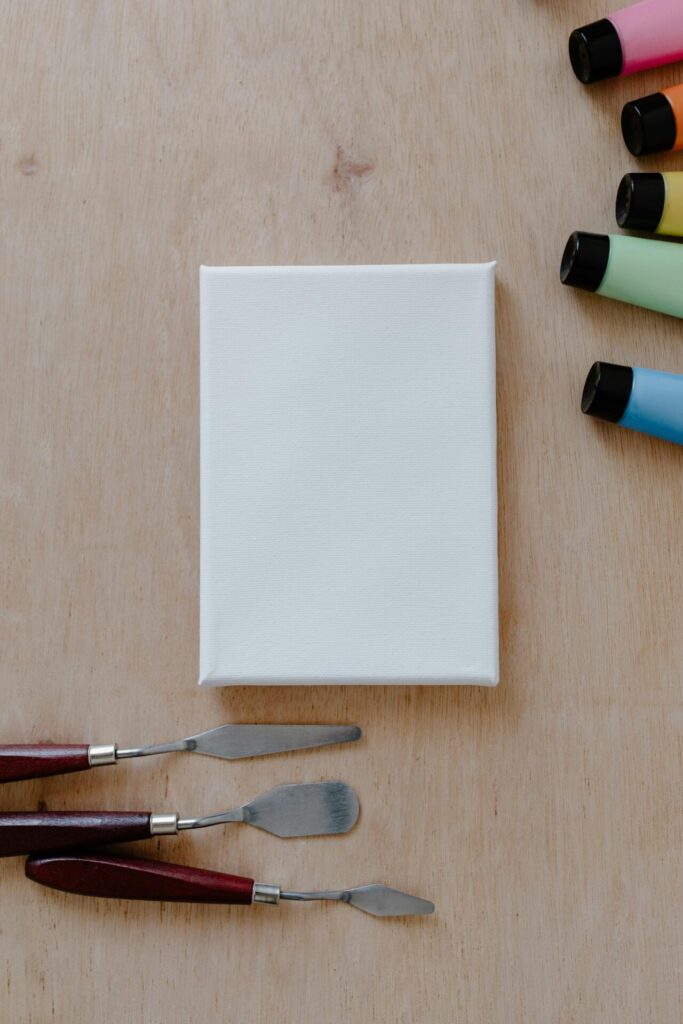
Before you start painting your DIY nursery book shelves, gather all the necessary materials and tools. Having everything ready will make the process smoother and more enjoyable.
Materials:
– Paint: Choose high-quality, non-toxic paint suitable for furniture. Latex or acrylic paint is a good choice for nursery shelves.
– Primer: A primer helps the paint adhere better to the surface, especially if you’re painting over a dark color or a slick material.
– Clear coat: A clear coat of varnish or polyurethane will protect your painted shelves and make them easier to clean.
Tools:
– Brushes and rollers: Different sizes of brushes and rollers will help you achieve a smooth finish. Small brushes are great for detailed work, while rollers are ideal for larger surfaces.
– Sandpaper: Sanding the shelves before painting helps to create a smooth surface and improves paint adhesion.
– Drop cloths or newspapers: Protect your work area from paint splatters.
– Painter’s tape: Use tape to mask off areas you don’t want to paint, such as edges or hardware.
– Screwdriver: If your shelves come with hardware, a screwdriver will be needed for assembly and disassembly.
By gathering all these materials and tools ahead of time, you’ll be well-prepared to start your DIY nursery book shelf project.
3. Preparing Your Nursery Book Shelves for Painting
Proper preparation is key to achieving a professional-looking paint job on your DIY nursery book shelves. Start by cleaning the shelves thoroughly to remove any dust, dirt, or grease. This step is crucial, especially if you’re using floating nursery book shelves that have been in storage or used previously.
Next, sand the surface of the shelves lightly with fine-grit sandpaper. This helps to create a smooth surface for the paint to adhere to. If the shelves are particularly rough or have an existing finish, you may need to use a coarser sandpaper first and then finish with a finer grit.
After sanding, wipe down the shelves with a damp cloth to remove any sanding dust. Allow the shelves to dry completely before applying primer. Using a primer is especially important if you’re painting over a dark color or a glossy finish. The primer will help the paint adhere better and provide a uniform base color.
Once the primer is dry, lightly sand the shelves again with fine-grit sandpaper. This step ensures a smooth finish and helps to remove any imperfections in the primer coat. Wipe the shelves with a damp cloth to remove any dust, and then you’re ready to start painting.
4. Selecting the Perfect Paint Colors
Choosing the right paint colors for your DIY nursery book shelves can be one of the most enjoyable parts of the project. The colors you select can set the tone for the entire room and reflect your personal style.
When selecting colors, consider the overall theme and color scheme of your nursery. Do you want the shelves to blend in with the walls or stand out as a focal point? Popular color schemes for nurseries include soft pastels like baby blue, mint green, and blush pink, as well as neutral tones like white, gray, and beige.
For a more vibrant look, you can choose bold colors like bright yellow, deep navy, or rich teal. If you’re feeling adventurous, consider using multiple colors to create a fun, playful effect. For example, you can paint each shelf a different color or create an ombre effect by blending two or more colors together.
Another option is to use stencils or decals to add patterns and designs to your shelves. This can be a great way to incorporate themes like animals, stars, or flowers into your nursery decor. Just make sure to use high-quality stencils and decals that won’t peel off over time.
No matter what colors you choose, remember to select non-toxic, child-safe paint. This is especially important for nursery furniture, as babies and young children are more sensitive to chemicals and fumes.
5. Creative Painting Techniques
Once you’ve selected your paint colors, it’s time to get creative with your painting techniques. There are many ways to add interest and personality to your DIY nursery book shelves, from simple techniques like solid color blocking to more complex methods like stenciling and ombre effects.
Ombre and Gradient Effects
Creating an ombre or gradient effect can add a beautiful, sophisticated touch to your nursery shelves. To achieve this look, you’ll need two or more shades of the same color. Start by painting the top of the shelf with the lightest shade and gradually blend it into the darker shades as you move down the shelf. This technique works best with a sponge or a soft brush to create smooth transitions between colors.
Stenciling and Patterns
Stenciling is a great way to add patterns and designs to your shelves without needing advanced painting skills. You can purchase stencils in various shapes and sizes, or even create your own using cardstock or plastic sheets. Popular stencil designs for nurseries include stars, hearts, polka dots, and animal shapes. Use painter’s tape to secure the stencil to the shelf, then apply paint using a small brush or sponge. Be sure to remove the stencil carefully while the paint is still wet to avoid smudging.
Using Decals and Stickers
Decals and stickers are another easy way to add decoration to your shelves. They come in a wide variety of designs, from cute animals to whimsical patterns. Simply apply the decals to the painted shelves once the paint is completely dry. This technique is especially useful if you want to change the design later on, as decals can often be removed without damaging the paint underneath.
These creative painting techniques can help you transform plain nursery shelves into beautiful, personalized pieces that enhance your nursery’s decor.
6. Adding Personal Touches
One of the best parts of customizing your DIY nursery book shelves is the opportunity to add personal touches that make them unique to your child’s room. There are many ways to incorporate personalization into your project, from adding your child’s name to creating themed designs that reflect their interests.
Customizing with Your Child’s Name or Initials
Adding your child’s name or initials to the shelves is a simple yet meaningful way to personalize them. You can do this by using stencils, decals, or even freehand painting. Choose a font and style that matches the overall decor of the nursery. For example, you might use a whimsical script for a fairy tale-themed room or bold block letters for a modern nursery.
Incorporating Themed Designs
Themed designs can bring a cohesive look to your nursery decor. Consider incorporating elements from your nursery’s theme into the design of your shelves. For example, if you have an animal-themed nursery, you could paint animal shapes or use animal decals on the shelves. If your theme is more abstract, like stars or rainbows, incorporate those elements into the design.
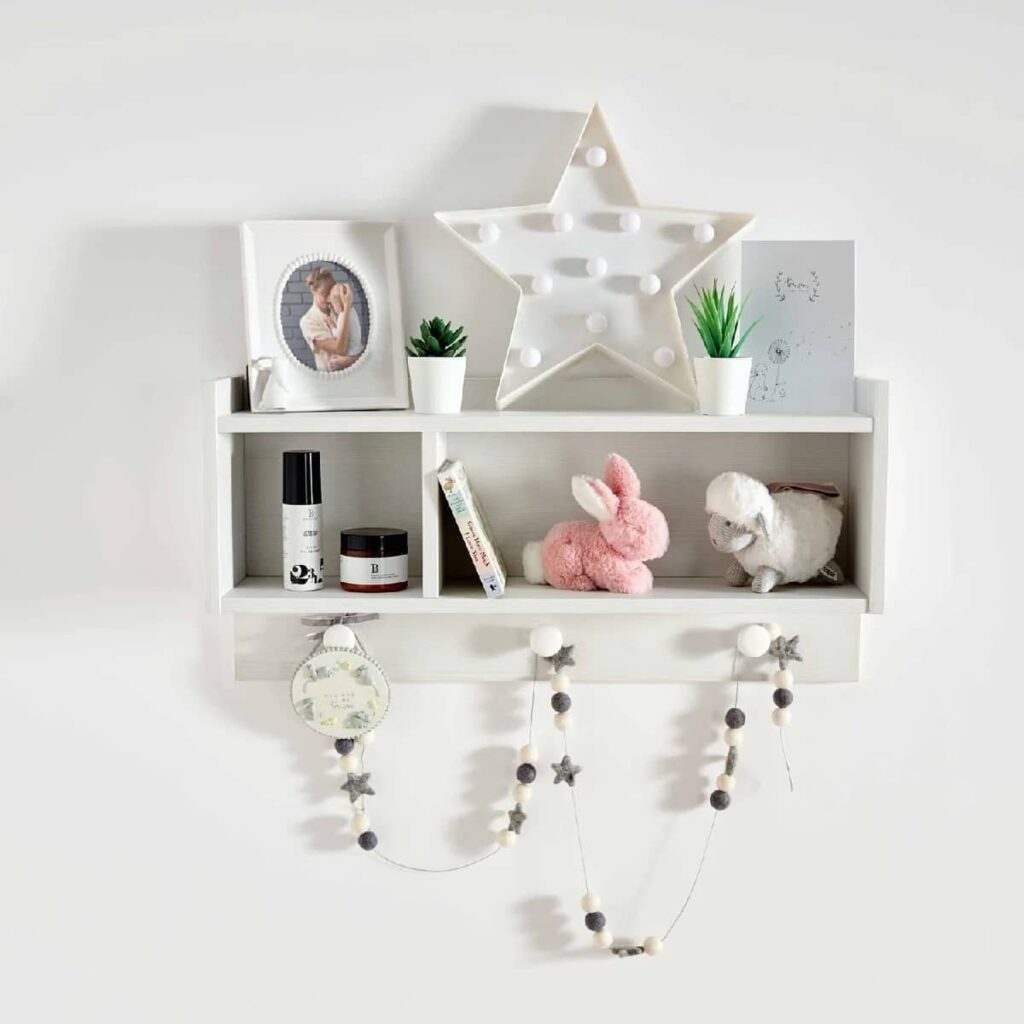
Using Decorative Items
In addition to painting and decals, you can use decorative items to add personal touches to your shelves. Small framed photos, personalized name blocks, or handmade crafts can be displayed on the shelves to make them truly unique. These items can be easily changed out as your child grows and their interests change.
Adding personal touches to your DIY nursery book shelves not only makes them special but also creates a warm, inviting space for your child to enjoy.
7. Protecting Your Painted Shelves
Once you’ve finished painting and personalizing your DIY nursery book shelves, it’s important to protect your hard work. Applying a clear coat of varnish or polyurethane will help to seal the paint and make the shelves more durable. This step is especially important for nursery furniture, which can be subjected to a lot of wear and tear.
Applying a Clear Coat
There are several types of clear coats to choose from, including matte, satin, and glossy finishes. A matte finish gives a soft, subtle look, while a glossy finish provides a shiny, polished appearance. Satin falls somewhere in between, offering a slight sheen without being too reflective. Choose the finish that best suits your aesthetic preferences and the overall look of your nursery.
To apply the clear coat, use a clean brush or a spray can, following the manufacturer’s instructions. Apply thin, even coats, allowing each layer to dry completely before adding the next. This will help to avoid drips and ensure a smooth, even finish.
Tips for Maintenance
Once your clear coat is applied and dried, maintaining the shelves is relatively simple. Regular dusting with a soft cloth will keep them looking fresh. If the shelves get dirty, wipe them down with a damp cloth and mild soap. Avoid using harsh chemicals or abrasive cleaners, as these can damage the paint and clear coat.
By protecting your painted shelves with a clear coat, you can ensure they remain beautiful and durable for years to come.
Installing Your DIY Nursery Book Shelves
After all the hard work of painting and customizing your DIY nursery book shelves, it’s time to install them. Proper installation is crucial to ensure that the shelves are secure and safe, especially in a nursery setting.
Finding the Perfect Location
Start by deciding where you want to place your shelves. Consider the height and accessibility; shelves should be within easy reach for both you and your child. Floating nursery book shelves are a great option for creating a neat, organized look. You can arrange them in various configurations to fit the space and your storage needs.
Securing the Shelves
When installing shelves on the wall, it’s important to find the studs in the wall to ensure a secure installation. Use a stud finder to locate the studs and mark their positions. If you’re using brackets, align them with the studs and use screws to attach them to the wall. For floating shelves, follow the manufacturer’s instructions for securing the mounting hardware.
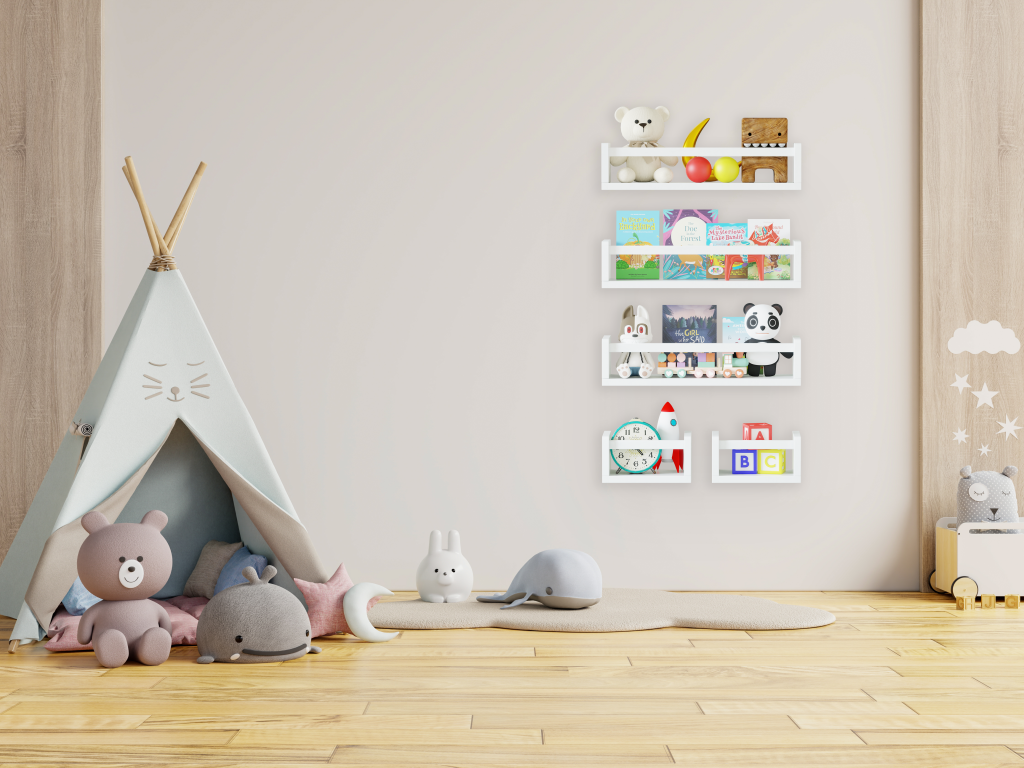
Arranging Books and Decor Items
Once the shelves are installed, it’s time to arrange your books and decor items. Start by placing larger items on the bottom shelves and smaller items on the top. This helps to create a balanced look and makes it easier for your child to reach their favorite books. Consider adding a mix of books, toys, and decorative items to create an interesting and visually appealing display.
Case Studies: Inspiring Examples
Seeing how others have customized their DIY nursery book shelves can provide inspiration and ideas for your own project. Here are a few examples of beautifully painted and personalized nursery shelves:
Example 1: Animal-Themed Nursery Shelves
One parent transformed plain wooden shelves into a delightful jungle-themed display. Using stencils and bright colors, they painted animals like lions, elephants, and monkeys on the shelves. The final touch was adding their child’s name in bold, colorful letters.
Example 2: Whimsical Fairy Tale Shelves
Another parent created a fairy tale-themed nursery with shelves painted in soft pastels and decorated with fairy tale characters. They used decals of castles, unicorns, and princesses to add a magical touch. The result was a dreamy, enchanting space perfect for storytime.
Example 3: Modern Geometric Shelves
For a more contemporary look, one family painted their shelves in a sleek, monochromatic color scheme and added geometric patterns using tape and paint. The clean lines and modern design created a stylish and sophisticated nursery that will grow with their child.
These case studies demonstrate the endless possibilities for customizing DIY nursery book shelves. Whether you prefer a whimsical, themed look or a modern, minimalist design, the key is to let your creativity shine.
Troubleshooting Common Issues
Even with careful planning and preparation, you may encounter some challenges when painting and customizing your DIY nursery book shelves. Here are some common issues and tips for resolving them:
Fixing Paint Drips and Smudges
Paint drips and smudges can happen, especially when working with multiple coats of paint. If you notice a drip while the paint is still wet, use a damp cloth to gently wipe it away. If the paint has already dried, you can sand the area lightly and apply a thin layer of paint to fix the blemish.
Addressing Uneven Paint Coverage
Uneven paint coverage can occur if the paint is applied too thinly or if the surface isn’t properly primed. To fix this, apply additional coats of paint, allowing each coat to dry completely before adding the next. Ensure that you use even brush strokes or roller movements to achieve a uniform finish.
Tips for Repainting and Touch-Ups
Over time, your nursery shelves may need touch-ups or a fresh coat of paint. To repaint, start by cleaning the shelves thoroughly and lightly sanding the surface to remove any gloss. Apply a primer if necessary, followed by one or more coats of your chosen paint color. For touch-ups, use a small brush to carefully apply paint to the affected areas, blending it with the surrounding paint to achieve a seamless finish.
By troubleshooting these common issues, you can ensure that your DIY nursery book shelves look their best and remain a beautiful addition to your nursery.
Conclusion
Customizing DIY nursery book shelves is a rewarding project that allows you to create a personalized and functional piece of furniture for your baby’s room. From selecting the right shelves to painting and adding personal touches, this guide has covered all the steps needed to achieve a professional-looking finish.
Remember, one popular choice for DIY nursery book shelves is by HOMEY PANDA, which offers high-quality, customizable shelves perfect for any nursery decor. By following the tips and techniques outlined in this guide, you can create beautiful, personalized shelves that will enhance your nursery and provide a special place for your child’s books and treasures.
We hope you found this guide helpful and inspiring. For more DIY projects and decorating tips, be sure to check out our blog. Happy decorating!